This guide will walk you through changing that wheel bearing. We’ll make it clear. You’ll learn why it’s important and how to do it right.
This way, your Defender stays reliable for all your adventures.
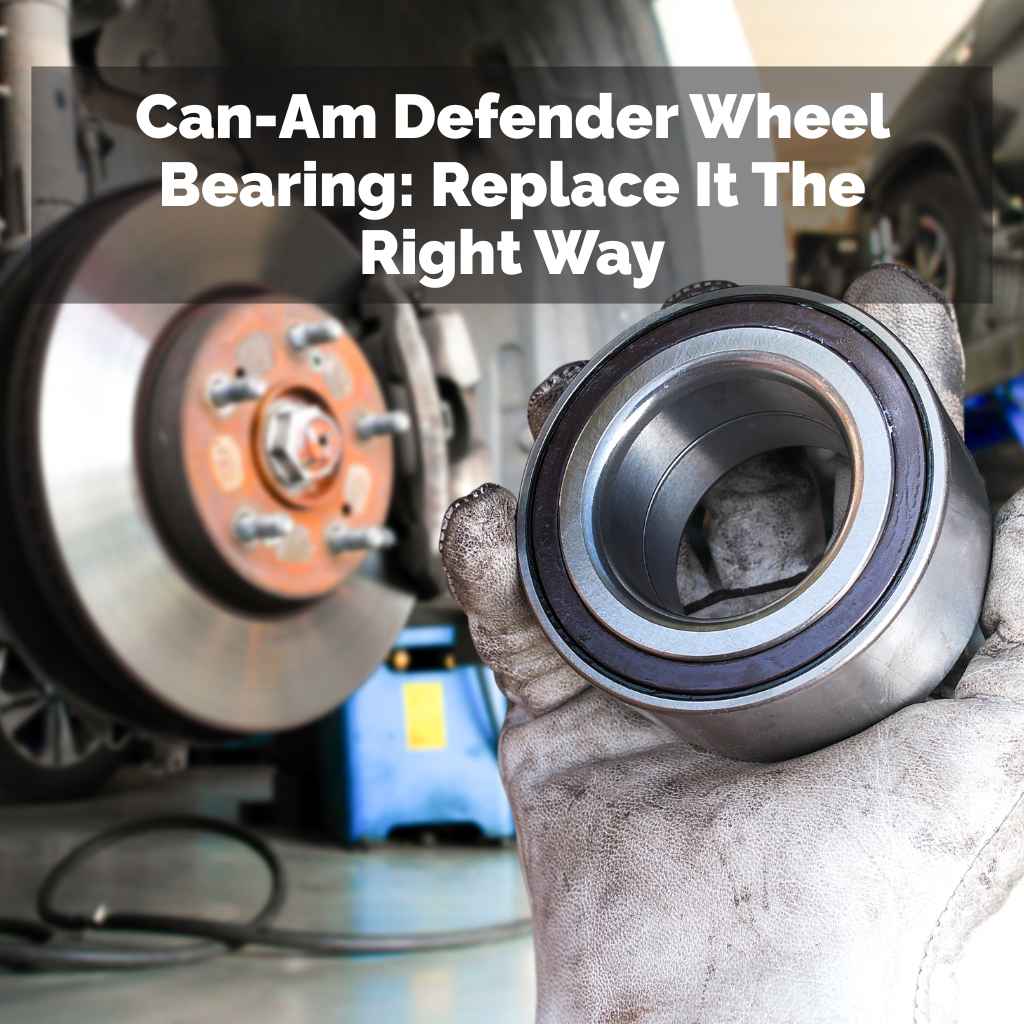
Replacing a Can-Am Defender wheel bearing involves removing the wheel, caliper, and hub to access the old bearing. You’ll then need to press out the old bearing and press in a new one, reassemble parts, and ensure everything is tight. Proper tools and technique prevent damage and ensure a secure fit.
Understanding Your Can-Am Defender Wheel Bearing
Your Can-Am Defender has wheel bearings in each wheel. These are critical parts. They let your wheels spin freely.
Think of them like tiny roller skates for your hubs. They handle a lot of stress.
They deal with weight. They handle side loads when you turn. And they take hits from bumps.
Over time, dirt, water, or simple wear can ruin them. A failing bearing makes noise. It can cause vibration.
If ignored, it can lead to bigger problems.
Knowing the signs is key. A hum that gets louder with speed is a big clue. A clicking or grinding sound is another.
A loose wheel is a serious sign. You can often feel play in the wheel when the vehicle is stopped. Gently push and pull the wheel.
Any looseness means a bad bearing.
Why Replacing a Wheel Bearing Matters
Ignoring a bad wheel bearing is risky. It’s not just about comfort. A worn-out bearing can seize up.
This could lock your wheel. That’s very dangerous on the trail. It could cause a crash.
It can also damage other parts.
You might damage your hub. The brake rotor could get ruined. The knuckle might also suffer.
Replacing the bearing early saves you money. It prevents bigger, more costly repairs down the line. It also keeps you safe.
Safety is always first.
My Own Wheel Bearing Scare
I remember a trip up in the mountains a few years back. It was late fall, and the air was crisp. I was exploring a new, rough trail with my Defender.
The sun was starting to dip, casting long shadows. Suddenly, I heard a weird noise.
It started as a faint hum. Then it got louder. It was a grinding sound.
It seemed to come from the front right wheel. My gut sank. I pulled over.
I got out and wiggled the wheel. It had way too much play. I was miles from anywhere.
That’s when I learned just how important a good wheel bearing is. I had to limp home slowly, worried the wheel would fall off. It was a stressful end to the day.
I learned then and there to always check bearings before a big ride.
Quick Check: Is it the Bearing?
Before you start, be sure it’s the wheel bearing. Try these simple steps:
- Lift the wheel off the ground.
- Spin it by hand. Listen for grinding.
- Gently wiggle the wheel up and down. Feel for looseness.
- Do the same side-to-side.
- Compare the sound and feel to other wheels.
If only one wheel feels or sounds bad, it’s likely the bearing. Sometimes brake issues can mimic bearing noise, but bearing play is usually distinct.
What You’ll Need to Get Started
Changing a wheel bearing isn’t hard. But you need the right tools. Get these ready before you begin.
This saves you trips to the store.
You’ll need a good socket set. A torque wrench is very important. You’ll need a breaker bar for stubborn nuts.
A good jack and jack stands are a must for safety. A hammer is useful. A pry bar might be needed.
You will also need a special tool. This is a bearing puller and installer kit. Or, a heavy-duty shop press.
Many mechanics use a press for this. It’s the safest way. Make sure you get a kit that fits your Defender’s bearing size.
Also, have some good penetrating oil. A wire brush is helpful too. And of course, new wheel bearings and seals.
Step-by-Step: Replacing the Wheel Bearing
Let’s get to it. Follow these steps carefully. Safety first, always.
1. Prepare Your Defender
Park your Can-Am Defender on a flat, level surface. Engage the parking brake. If you have wheel chocks, use them on the opposite wheel.
This stops the vehicle from rolling.
Loosen the lug nuts on the wheel you’re working on. Just loosen them a bit. Do not remove them yet.
This is easier while the wheel is on the ground. It has more grip.
2. Lift and Support the Vehicle
Use your jack to lift the front or rear of your Defender. Lift it high enough so the wheel is completely off the ground. Place a sturdy jack stand under the frame.
Ensure it’s on a strong point. Lower the vehicle onto the jack stand. Never work under a vehicle supported only by a jack.
3. Remove the Wheel
Now you can fully remove the lug nuts. Keep them safe in a small container. Pull the wheel off the hub.
Set it aside. You can also place it under the frame for extra safety.
4. Access the Hub Assembly
You’ll see the brake caliper and rotor next. You need to remove the caliper. Find the bolts holding it.
They are usually on the back. Remove these bolts. You might need to use a breaker bar.
Be careful not to damage the brake line.
With the caliper bolts out, carefully lift the caliper off the rotor. You don’t need to disconnect the brake line. Just tie the caliper up and out of the way.
Use a bungee cord or wire. Let it hang from the suspension. Make sure it’s not straining the brake hose.
5. Remove the Brake Rotor
The brake rotor should now be loose. Sometimes it’s held on by a small screw. Remove this if present.
Then, slide the rotor off the hub. If it’s stuck, a few gentle taps with a hammer might help. Or use penetrating oil.
6. Remove the Hub Assembly
The hub is what the wheel bolts to. It’s attached to the steering knuckle or trailing arm. It holds the wheel bearing.
There will be several bolts holding the hub assembly to the knuckle. These are often large and tight.
Use your socket set and breaker bar. Loosen and remove these bolts. Keep track of which bolt goes where.
Sometimes they are different lengths. Once the bolts are out, the hub should be free.
What is a Hub?
The hub is the part your wheel attaches to. It’s a round metal piece. It contains the wheel bearing.
The hub spins with the wheel. It’s connected to the axle or driveshaft.
7. Remove the Old Wheel Bearing
This is often the trickiest part. The wheel bearing is pressed into the hub carrier or knuckle. You need to get the old one out.
And then press the new one in.
If you have a press, this is the best tool. Place the hub carrier on the press. Use a socket or punch that fits the edge of the bearing.
Carefully press the old bearing out. Support the hub carrier so it doesn’t get damaged.
If you don’t have a press, you might use a bearing puller tool. Follow the tool’s instructions. Sometimes heat can help loosen a stubborn bearing.
Use a heat gun or a torch very carefully. Be aware of fire risks. And don’t overheat the metal.
Once the old bearing is out, clean the area. Use your wire brush. Remove any rust or debris.
This ensures the new bearing seats properly.
Common Bearing Types
Most Can-Am Defenders use sealed ball bearings. They are designed for long life. They come pre-greased.
You don’t need to add more grease. Once a seal is broken, the bearing is exposed. Dirt and water can get in.
8. Install the New Wheel Bearing
Now for the new bearing. Make sure it’s the correct one for your Defender. Clean the bore where the bearing sits.
Ensure it’s smooth and free of debris. Apply a thin layer of grease to the bore. This helps it slide in easier.
Using your press or bearing installer tool, carefully press the new bearing into place. Align it straight. You want it to go in evenly.
Press until it’s fully seated. You should feel it stop. Do not force it.
If it’s not going in straight, stop. Realign it. Pushing it in crooked will damage it.
Use the Right Size Press Plates
When pressing, use plates that support the outer race of the bearing. Avoid pressing on the inner race. This can damage the bearing.
If you’re unsure, look for guides specific to your bearing type.
9. Reassemble the Hub Assembly
Once the new bearing is in, reattach the hub assembly. Bolt it back onto the knuckle or trailing arm. Tighten these bolts securely.
Use your torque wrench. Refer to your Defender’s service manual for the correct torque specs. This is crucial.
Loose bolts can cause the hub to separate.
10. Reinstall the Brake Rotor
Slide the brake rotor back onto the hub. Make sure it’s seated correctly. Reinstall any small retaining screws if your rotor has them.
11. Reinstall the Brake Caliper
Place the brake caliper back over the rotor. It should slide on easily. Reinstall the caliper bolts.
Tighten them securely. Again, check your service manual for torque values. You don’t want loose brake parts.
12. Reinstall the Wheel
Mount the wheel back onto the hub studs. Thread the lug nuts on by hand. Tighten them in a star pattern.
This ensures the wheel sits evenly. Once snug, lower the vehicle. Then, fully tighten the lug nuts with your torque wrench.
Use the correct torque setting from your manual.
13. Final Checks
Before you hit the trail, do a final check. Spin the wheel. It should spin freely.
There should be no grinding or noise. Wiggle the wheel again. There should be no play.
Ensure all bolts you touched are tight. Double-check the lug nuts one last time.
A Note on Seals
Wheel bearings often come with new seals. It’s wise to replace these whenever you replace a bearing. Seals keep dirt and water out.
A damaged seal will lead to a new bearing failure.
Real-World Scenarios and Your Defender
Life on the trail isn’t always smooth. Your Can-Am Defender faces tough conditions. Think about mud.
Deep mud can cling to everything. It holds water against your bearings. Salt from treated roads in winter is also bad.
It speeds up corrosion.
High-speed riding can heat up bearings. Rough terrain with big jolts adds stress. Even just washing your Defender can introduce water.
If you blast it with a pressure washer right at the wheel hubs, you might force water past the seals. These are common ways bearings get damaged.
Your driving style matters too. If you tend to hit obstacles hard, your bearings take a beating. If you ride in wet, muddy conditions often, more frequent checks are wise.
Understanding these scenarios helps you prevent future issues.
Driving Habits Impact Bearing Life
Aggressive Driving: Hitting bumps hard, sharp turns at speed.
Mud Riding: Prolonged exposure to mud and water.
Washing: Using high-pressure water near hubs.
Storage: Leaving the vehicle sitting for long periods, especially in damp areas.
When is a Wheel Bearing Bad? When is it Okay?
It’s normal for a wheel to feel perfectly solid. No wobble. No noise.
You shouldn’t hear any grinding when you spin it. A new bearing feels smooth. It spins quietly.
You should worry if you hear that hum or grinding. If you can feel any play in the wheel when it’s lifted. A wheel that feels loose is a big warning.
Don’t ignore it. Some minor vibration might start before the noise. That’s also a sign.
If your Defender has been sitting for a while, you might hear a slight noise when you first start moving. This is often just surface rust on the rotor or brake pads. It usually goes away after a few stops.
This isn’t a bearing issue.
Simple Checks You Can Do
- Listen: Hear any unusual noises when driving?
- Feel: Does the steering wheel shake or vibrate?
- Look: Any dust or grease leaking from the hub area?
- Wiggle: Can you feel looseness in the wheel when lifted?
Quick Fixes and Tips for Longevity
The best “fix” for wheel bearings is prevention. Keep them clean. After muddy rides, rinse your Defender.
Focus on cleaning around the wheels. This helps remove grit that can damage seals.
When washing, avoid high-pressure jets directly at the wheel hubs. Use a gentler spray. This prevents forcing water into the seals.
Always use quality replacement parts. Cheap bearings might seem like a deal, but they often fail sooner.
If you ride in really harsh conditions, consider greasing your hubs between bearing changes. Some people add a zerk fitting. This allows you to force fresh grease into the bearing area.
Check your specific Defender model. Some are not designed for this. It can sometimes push seals out.
Regular maintenance is key. When you do tire rotations, take a moment to check each wheel. Spin it.
Feel for play. This simple check can save you a major headache later.
Frequently Asked Questions about Can-Am Defender Wheel Bearings
How often should I replace my Can-Am Defender wheel bearings?
There’s no set schedule for replacing wheel bearings. It depends on how you ride. If you ride in mud, water, or rough terrain often, they might wear out faster.
A common sign is noise or looseness. Many people replace them only when they fail. It’s wise to check them every few rides.
Can I drive with a bad wheel bearing?
It’s not recommended to drive with a bad wheel bearing. It’s unsafe. The bearing can fail completely.
This could cause your wheel to lock up or even detach. This is extremely dangerous. Get it fixed as soon as possible.
How do I know if it’s a wheel bearing or a CV joint?
Wheel bearings typically make a humming or grinding noise that changes with speed. They also cause looseness in the wheel. CV joints usually make a clicking noise when turning.
They can also cause vibrations. Sometimes both can fail, making diagnosis tricky. A mechanic can usually tell the difference.
What does it cost to replace a Can-Am Defender wheel bearing?
The cost varies. If you do it yourself, you only pay for the bearing, which might be $30-$80 per wheel. If you take it to a shop, labor costs will add to this.
Expect to pay $100-$250 or more per wheel, depending on the shop and your location.
Can I just grease a worn-out wheel bearing?
Once a sealed wheel bearing is worn or contaminated, greasing it won’t fix it. The seals are likely compromised. Adding grease might temporarily quiet it.
But it won’t restore its function. It will likely fail again quickly. Replacement is the only real solution.
What torque should I use for wheel bearing hub bolts?
Torque specifications vary by Can-Am Defender model and year. Always consult your vehicle’s official service manual. Incorrect torque can lead to component failure or looseness.
It’s crucial to get this right for safety.
Conclusion
Taking care of your Can-Am Defender’s wheel bearings is vital. They keep your wheels turning smoothly and safely. By understanding the signs of a bad bearing and following these steps, you can tackle the replacement yourself.
This saves you money and gives you confidence. Knowing your machine is in good shape lets you focus on the adventure. Ride safe and enjoy the trails!