To bleed brakes with a Hydroboost system, first bleed the Hydroboost unit itself with the engine off by slowly pumping the brake pedal 20-30 times until resistance feels firm. Then, top off the power steering fluid. Finally, proceed with a standard two-person brake bleed at the calipers, starting with the one furthest from the master cylinder.
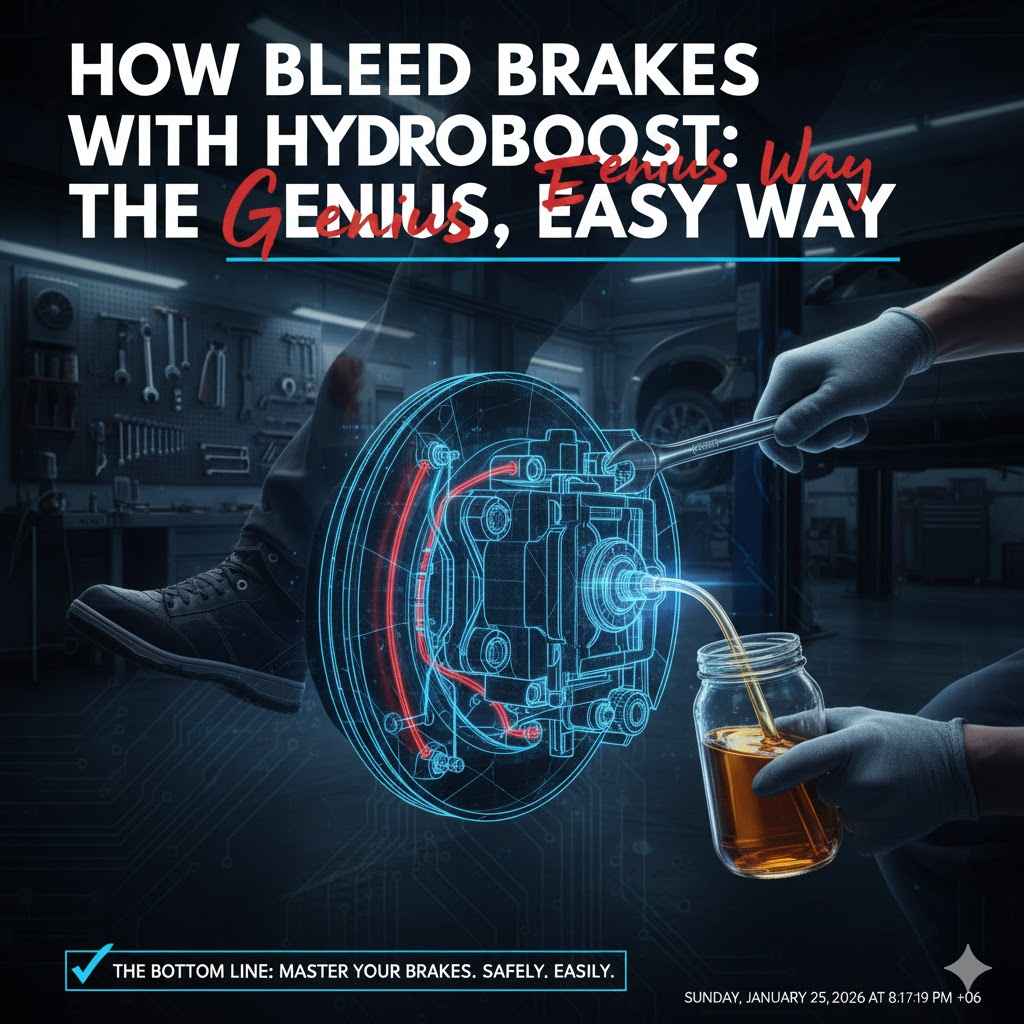
Does your brake pedal feel soft, spongy, or sink to the floor? It’s a scary feeling, and it often means there’s air trapped in your brake lines. For trucks and larger vehicles with a Hydroboost system, getting that air out can seem like a job for a pro. But what if I told you there’s a simple, genius way to do it yourself? You don’t need a garage full of fancy tools, just a little patience and the right know-how.
I’m Dustin, and I’m here to make car care easy. Forget the confusing mechanic jargon. We’re going to walk through this process step-by-step, making sure you feel confident and safe. By the end of this guide, you’ll know exactly how to get that firm, responsive brake pedal back and save yourself a trip to the shop. Let’s get started!
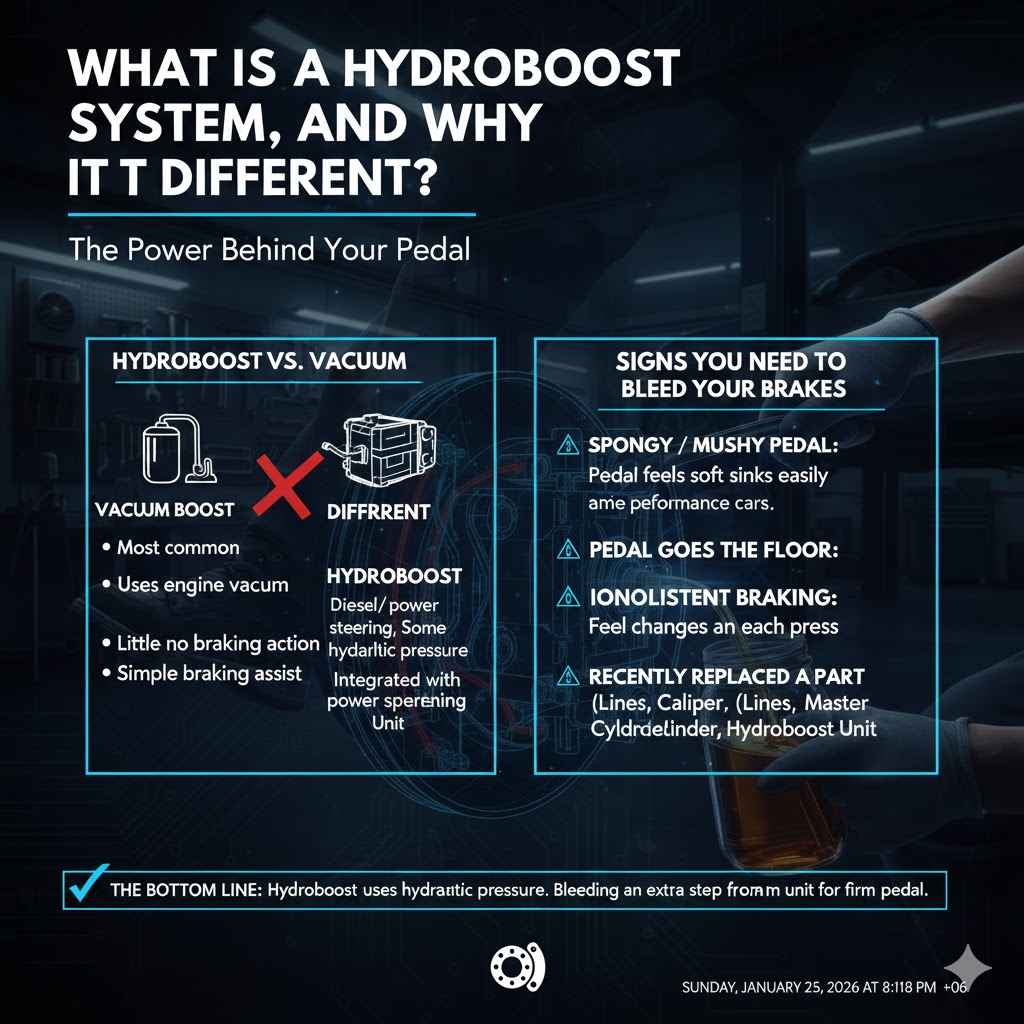
What is a Hydroboost System, and Why Is It Different?
Before we grab our wrenches, let’s quickly understand what we’re working with. Most cars use a vacuum booster to help you press the brake pedal. It’s that big, round, black canister attached to the firewall behind your brake master cylinder. It uses engine vacuum to make braking easier.
A Hydroboost system does the same job but in a different way. Instead of vacuum, it uses hydraulic pressure from your power steering pump. You’ll typically find these systems on:
- Diesel trucks
- Heavier-duty gasoline trucks and vans
- Some performance cars with limited engine bay space
Why does this matter? Because the Hydroboost unit is part of both your braking and power steering systems, bleeding it requires a special, yet simple, extra step. If you only bleed the brake calipers, you can leave air trapped in the Hydroboost unit, resulting in a spongy pedal no matter how many times you bleed the lines. The genius trick is knowing how to get that air out first!
Signs You Need to Bleed Your Brakes
Air in the brake lines is the number one enemy of a firm brake pedal. Air is compressible, while brake fluid is not. When you press the pedal, you want that force going straight to the brakes, not being wasted squishing air bubbles. Here are the classic signs you have air in your system:
- Spongy or Mushy Pedal: The pedal feels soft and sinks further than usual before the brakes engage.
- Pedal Goes to the Floor: In serious cases, the pedal might travel all the way to the floor with little braking action.
- Inconsistent Braking: The brakes feel different each time you press them.
- You’ve Recently Replaced a Part: If you’ve changed a brake line, caliper, master cylinder, or the Hydroboost unit itself, you absolutely must bleed the system.
Safety First: Your Most Important Tool
We’re working on your vehicle’s most critical safety feature. Let’s take a moment to put safety at the top of our list. This isn’t about being overly cautious; it’s about being smart and preventing accidents. Remember, your well-being is more important than any repair.
Here are your non-negotiable safety rules:
- Work on a Level Surface: Never work on a vehicle that’s on a slope. A flat, level driveway or garage floor is essential.
- Use Jack Stands: Never, ever work under a vehicle supported only by a jack. A jack can fail. Once you lift the vehicle, secure it with properly rated jack stands. The National Highway Traffic Safety Administration (NHTSA) stresses the importance of proper vehicle maintenance for safety, and that starts with how you work on it.
- Wear Protective Gear: Safety glasses are a must to protect your eyes from brake fluid splashes. Gloves are also highly recommended, as brake fluid can irritate the skin.
- Engine Off (Mostly): For most of this process, the engine will be OFF. We will only run it for a very short, specific step. Keep keys out of the ignition until instructed.
- Brake Fluid is Caustic: Brake fluid can eat through paint. Keep a rag handy to wipe up any spills immediately.
- Have a Helper: While there are one-person bleeders, the classic two-person method is the most reliable for beginners. Grab a friend or family member to help pump the brakes.
Tools and Supplies You’ll Need
You don’t need a professional mechanic’s toolbox for this job. Most of these items are common hand tools or can be bought cheaply at any auto parts store. Gathering everything before you start will make the process smooth and frustration-free.
| Tool/Supply | Why You Need It |
|---|---|
| Box-End Wrench (for bleeder screws) | Fits snugly on the bleeder screws to open and close them. The size varies, but 8mm, 10mm, or 3/8″ are common. Using a box-end prevents rounding off the screw. |
| New, Sealed Brake Fluid | Check your owner’s manual or the master cylinder cap for the correct type (DOT 3, DOT 4, etc.). Never use fluid from an old, open bottle. |
| Clear Tubing | Fits over the bleeder screw to direct old fluid into a catch container. This lets you see the air bubbles as they come out. 1/4″ or 3/16″ vinyl tubing works well. |
| Clear Jar or Bottle (Catch Can) | To collect the old brake fluid. Pour a little new fluid in the bottom to prevent air from being sucked back in. |
| A Reliable Helper | Your “pedal pusher.” Their job is to press and hold the brake pedal on your command. |
| Floor Jack and Jack Stands | To safely lift and support the vehicle so you can access the wheels. |
| Lug Wrench | To remove the wheels. |
| Turkey Baster or Syringe | Optional, but helpful for removing old, dirty fluid from the master cylinder reservoir. |
| Power Steering Fluid | Since the Hydroboost unit uses it, you’ll want to have the correct type on hand to top off the reservoir. Check your manual. |
| Shop Rags or Paper Towels | For cleaning up spills and keeping things tidy. |
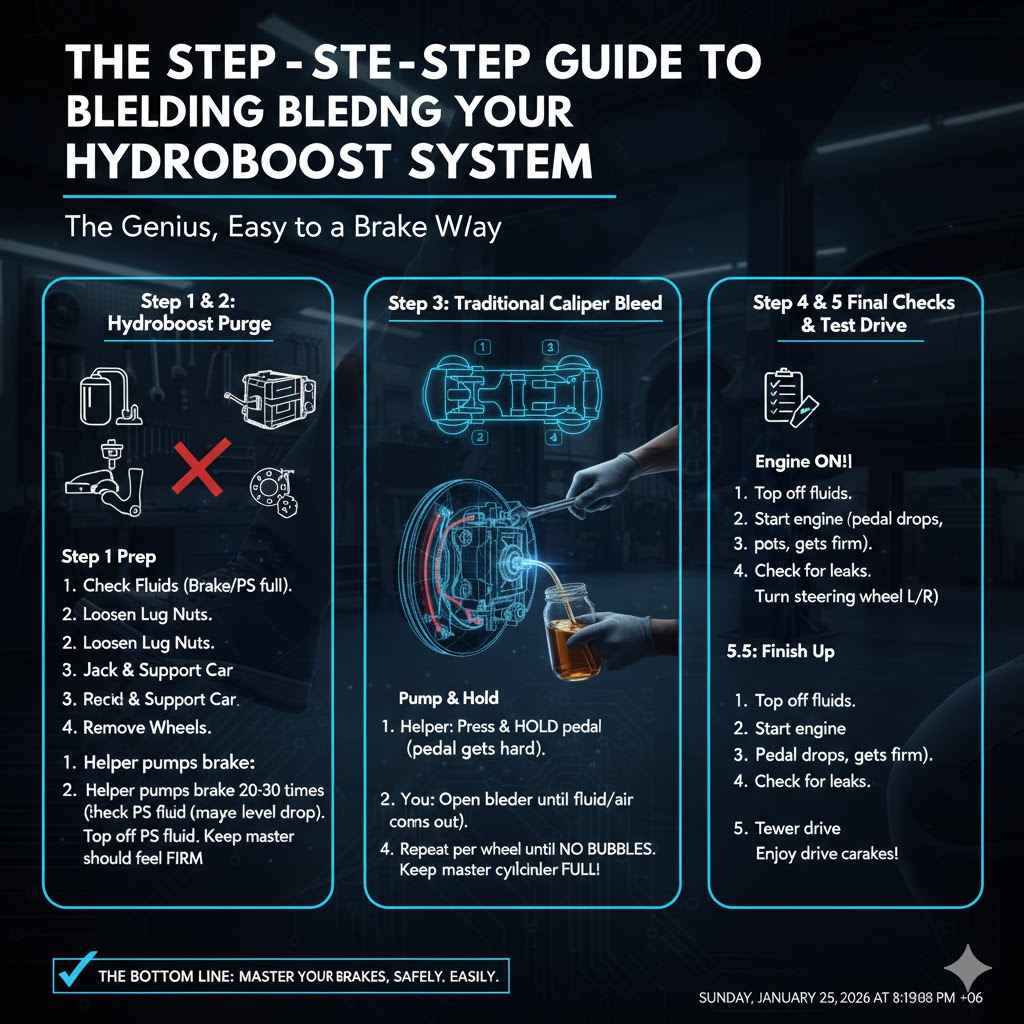
The Step-by-Step Guide to Bleeding Your Hydroboost System
Alright, you’ve got your tools, your helper is ready, and your car is in a safe spot. Let’s break this down into simple, manageable steps. The “genius” part of this method is the order of operations. We will purge the air from the Hydroboost unit before we even touch the wheels. This is the secret to a rock-solid pedal.
Step 1: Prepare Your Vehicle
First things first, let’s get set up for success.
- Check the Fluid Levels: Open the hood. Locate the brake master cylinder reservoir (a small plastic tank, usually on the driver’s side) and the power steering fluid reservoir. Make sure both are full to the “MAX” line. If the brake fluid looks very dark or dirty, use a turkey baster to remove most of the old fluid and refill it with fresh fluid. Don’t empty it completely, or you’ll introduce more air!
- Secure the Vehicle: Put the car in Park (or in gear for a manual) and engage the parking brake.
- Loosen the Lug Nuts: While the car is still on the ground, use your lug wrench to slightly loosen the lug nuts on all four wheels. Don’t remove them, just break them free. This makes them much easier to remove once the car is in the air.
- Lift and Support the Vehicle: Using your floor jack, lift the vehicle at the manufacturer-recommended jack points. Place your jack stands securely under the frame or designated support points, and then slowly lower the vehicle onto the stands. Give the car a gentle push to ensure it’s stable.
- Remove the Wheels: Now you can finish unscrewing the lug nuts and remove all four wheels. This gives you clear access to the brake calipers and bleeder screws.
Step 2: Bleed the Hydroboost Unit (The Magic Step)
This is where we tackle the Hydroboost unit directly. This step pushes any trapped air out of the booster and into the master cylinder, where it’s harmless. Make sure the engine is OFF for this entire step.
- Get Your Helper in the Driver’s Seat: Have them get ready to work the brake pedal.
- Pump the Pedal: Instruct your helper to slowly and steadily press the brake pedal all the way down to the floor, then let it come all the way back up. The pedal will likely feel very hard because the engine is off and the booster has no power—this is normal.
- Repeat, Repeat, Repeat: Have them repeat this slow, full pump about 20 to 30 times. It might seem like a lot, but this action is physically cycling fluid and air through the Hydroboost unit. You are manually purging the system.
- Check for Firmness: After 20-30 pumps, the pedal should start to feel firmer and more consistent. The initial “dead space” at the top of the pedal travel should be gone.
- Check the Power Steering Fluid: Open the power steering reservoir. You may see some bubbles or foam, which is a good sign—it means air has been purged. The fluid level might have dropped slightly. Top it off to the “FULL COLD” line with the correct power steering fluid.
That’s it! You’ve just completed the most overlooked and critical part of bleeding a Hydroboost system. Now, we can move on to the traditional brake bleeding process with confidence.
Step 3: The Traditional Brake Caliper Bleed
Now we’ll bleed the brake lines at each wheel. The goal is to push the old fluid and any remaining air out through the bleeder screws. The bleeding sequence is crucial: you always start with the brake caliper that is furthest from the master cylinder and work your way closer.
For most vehicles, the sequence is:
- Right Rear (Passenger Rear)
- Left Rear (Driver Rear)
- Right Front (Passenger Front)
- Left Front (Driver Front)
Here’s the two-person process for each wheel:
- Locate the Bleeder Screw: On the back of the brake caliper, you’ll find a small nipple with a nut at its base. This is the bleeder screw. Clean any dirt or rust off it with a wire brush.
- Set Up Your Catch Bottle: Place your clear jar on the ground below the caliper. Fill it with about an inch of new brake fluid. Attach your clear vinyl tubing to the bleeder screw and put the other end into the jar, making sure the end of the tube is submerged in the fluid. This creates an airlock, preventing air from being sucked back in.
- Get Your Tools Ready: Place your box-end wrench over the bleeder screw. You’re ready to go.
- The “Pump and Hold” Dance: This is a simple, four-step command sequence you’ll repeat with your helper.
You Say: “Down!” or “Press!” Your helper presses the brake pedal down slowly and steadily and holds it to the floor. They will say “Down” or “Holding” to confirm.
You Do: As they are holding the pedal down, you turn the bleeder screw about a quarter to a half turn counter-clockwise. You’ll see fluid and air bubbles shoot down the tube.
You Do: Before the pedal hits the floor, and while fluid is still flowing, tighten the bleeder screw back up (clockwise). Don’t overtighten it—just snug is fine.
You Say: “Up!” or “Release!” Your helper can now release the brake pedal.
- Repeat Until Clear: Repeat this “pump and hold” sequence on the same wheel until you see no more air bubbles in the clear tubing. You should see a solid stream of clean, new fluid. This might take 5-10 repetitions per wheel.
- Monitor the Master Cylinder: After every 4-5 pumps, check the brake fluid level in the master cylinder reservoir. NEVER let it run dry! If it does, you will suck a massive amount of air into the system and have to start all over. Keep it topped off with fresh fluid.
- Move to the Next Wheel: Once the first wheel is done, tighten the bleeder screw one final time, remove the tube, and move to the next wheel in the sequence, repeating the entire process.
This process, while simple, is the most effective way to ensure a complete and thorough bleed. Take your time and communicate clearly with your helper.
Step 4: Final Checks and System Pressurization
You’re almost there! Once all four wheels are bled, it’s time to do a final check before putting the wheels back on.
- Top Off Fluids: Do one last check of the brake fluid and power steering fluid levels. Top them off to the “MAX” or “FULL” line. Securely replace the caps.
- Pressurize the System: With the engine still off, have your helper pump the brake pedal a few times. It should feel firm and high. It should not feel spongy or sink to the floor.
- Check for Leaks: With pressure on the pedal, quickly inspect all four bleeder screws and the brake line connections for any signs of leaking fluid. If you see any drips, snug the fitting up slightly.
- The Engine-On Test: Now for the final test. Make sure everyone is clear of the vehicle. Start the engine. The brake pedal will drop slightly as the Hydroboost unit pressurizes—this is normal. With the engine running, the pedal should feel firm and responsive. Hold steady pressure on the pedal for 30 seconds. It should not slowly sink to the floor.
- Turn the Steering Wheel: With the engine still running, turn the steering wheel from lock to lock (all the way to the left, then all the way to the right) a couple of times. This helps purge any final tiny air bubbles from the power steering side of the system. You may hear a slight whining noise, which should quiet down as the air escapes.
Step 5: Finishing Up and Test Drive
If everything feels good, it’s time to wrap it up.
- Reinstall Wheels: Put the wheels back on and tighten the lug nuts by hand until they are snug.
- Lower the Vehicle: Carefully jack the vehicle up off the jack stands, remove the stands, and lower the vehicle back to the ground.
- Torque the Lug Nuts: Use a torque wrench to tighten the lug nuts to the manufacturer’s specified torque setting (you can find this in your owner’s manual). Tighten them in a star pattern to ensure the wheel is seated evenly.
- Careful Test Drive: Start in your driveway. Test the brakes at a very low speed. They should feel strong and immediate. Then, take a careful test drive around the block, keeping your speed low and avoiding traffic. The brakes should feel better than ever.
Congratulations! You’ve successfully bled your Hydroboost brake system the smart way. You’ve not only fixed the problem but also saved money and gained valuable experience.
Frequently Asked Questions (FAQ)
Can I bleed brakes with Hydroboost by myself?
While it’s possible with a vacuum bleeder or a pressure bleeder kit, the two-person method described here is the most reliable and foolproof for beginners. It eliminates the risk of equipment failure and ensures you get a great result on your first try.
What’s the difference between DOT 3 and DOT 4 brake fluid?
DOT 4 has a higher boiling point than DOT 3, which is better for heavy-duty or high-performance applications. They are often compatible, but you should never use DOT 3 in a system that requires DOT 4. Always use the fluid type specified in your owner’s manual or on the reservoir cap. Never use DOT 5 (silicone-based) fluid unless your vehicle specifically requires it, as it is not compatible with DOT 3 or 4.
How often should I bleed my brakes?
Most manufacturers recommend replacing your brake fluid (which includes bleeding the system) every 2 to 3 years. Brake fluid absorbs moisture from the air over time, which lowers its boiling point and can cause corrosion inside your brake system. Bleeding is also necessary any time you replace a hydraulic brake component.
Why is my power steering pump whining after bleeding the brakes?
A whining noise from the power steering pump is usually caused by air still trapped in the fluid. To fix this, with the engine running, slowly turn the steering wheel from full lock to full lock several times. This will help work the remaining air bubbles out. Check and top off the power steering fluid level afterward. If the noise persists, you may need to repeat the Hydroboost bleeding step (engine off, pumping the brake pedal).
What if my brakes still feel spongy after bleeding?
If the pedal is still soft, it usually means there is still air trapped somewhere. Go back and repeat the entire process, starting with the Hydroboost bleed and then the calipers. Be extra careful not to let the master cylinder run low on fluid. In rare cases, a spongy pedal can also be a sign of a failing master cylinder or old, flexible rubber brake hoses that are expanding under pressure.
How do I dispose of old brake fluid?
Brake fluid is hazardous waste and should never be poured down the drain or on the ground. Pour the old fluid from your catch bottle into a sealable container (like the empty new fluid bottle). Most auto parts stores and local recycling centers will accept used automotive fluids for free. You can check resources like the EPA’s website for local disposal guidelines.
Conclusion: You Did It!
See? That wasn’t so bad! Taking on a job like bleeding your brakes, especially on a system with a Hydroboost unit, can feel intimidating at first. But by breaking it down into simple, logical steps, you can see it’s a perfectly achievable DIY task. The key is understanding that special first step: purging the air from the Hydroboost unit before you even touch the wheels. That little piece of knowledge is what separates a frustrating afternoon from a successful repair.
You’ve made your vehicle safer, saved a good bit of money, and learned a valuable skill. Be proud of the work you’ve done. Keep that master cylinder topped off, remember your safety rules, and drive with the confidence that comes from knowing your brakes are in top-notch condition, all thanks to you.