If you suspect your brake pedal is bad, look for a pedal that feels spongy, sinks to the floor, makes strange noises, or if your braking performance noticeably declines. These signs usually point toward issues with hydraulic fluid, the master cylinder, or the booster, requiring immediate safety attention.
Hi there! I’m Dustin Hall, and I know how unsettling it is when something feels “off” with your car’s brakes—they are your number one safety system! You push the pedal expecting firm stopping power, but instead, you get mushiness or unexpected noises. It’s frustrating, and frankly, a little scary. Many drivers get worried, thinking they need an expensive brake job, but sometimes the problem is simpler, or at least, you can identify the core issue before you even visit the shop.
Knowing the essential signs is the first step to keeping your car safe and avoiding unnecessary repair bills. We are going to walk through exactly what to look for so you can tell if that brake pedal is truly sending you a warning signal.
Essential Signs Your Brake Pedal Is Not Working Right
When we talk about a “bad brake pedal,” we usually aren’t talking about the physical plastic or metal pedal itself rotting away. Instead, we are focusing on the feel and function of the pedal assembly and the hydraulic system it controls. The pedal is your direct link to the braking force, so any change in its behavior is critical to investigate.
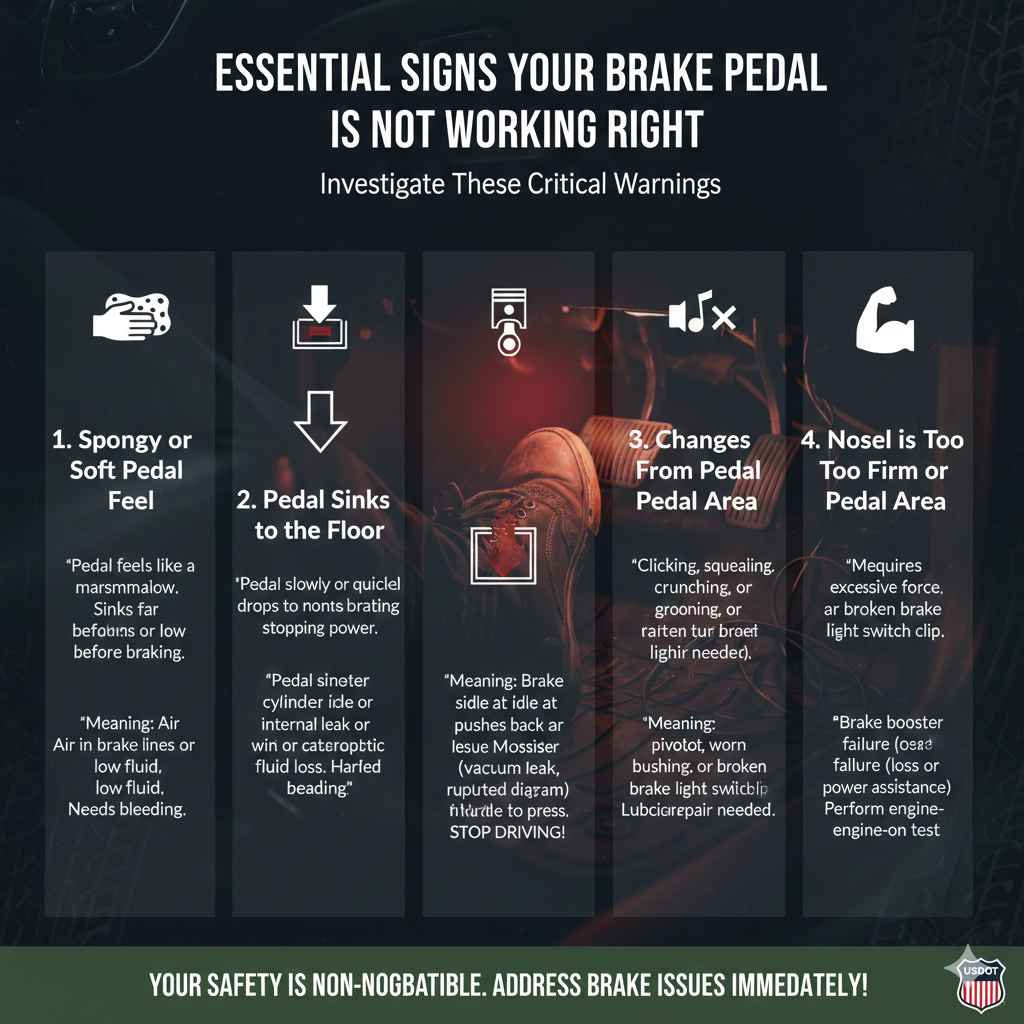
Sign 1: A Spongy or Soft Pedal Feel
This is perhaps the most classic symptom. When you press the pedal, it feels like you are pushing into a giant marshmallow instead of solid wood. You have to push it much further than normal to get the brakes to engage.
What this means for you: A spongy pedal almost always points to air being trapped inside the hydraulic brake lines. Brakes rely on incompressible brake fluid to transfer the force from your foot to the calipers. Air, however, compresses easily, which is why your pedal sinks before the brakes work. This is often a sign that fluid is low or that the system needs to be “bled” (the trapped air removed).
Sign 2: The Pedal Sinks to the Floor
Imagine pressing the brake pedal, and it just keeps going, eventually hitting the carpet or firewall without bringing the car to a stop, or maybe it stops slowing down only when the pedal is almost touching the floor. This is a significant safety issue that needs immediate attention.
What this means for you: A pedal that sinks slowly while you hold pressure often indicates a problem with the master cylinder. The master cylinder is the heart of your hydraulic system; it uses pistons to push fluid into the lines. If internal seals (cups) wear out, fluid bypasses the seals, creating a leak inside the master cylinder itself. This means you lose the pressure needed to stop.
If the pedal sinks immediately to the floor and stays there the moment you press it, you likely have a catastrophic loss of fluid—perhaps a major line burst or the master cylinder has failed completely. If this happens, pull over as safely as possible and do not drive the vehicle.
Sign 3: Changes in Pedal Height When Idling or Accelerating
Sometimes the pedal height changes subtly depending on what else the engine is doing. This points directly toward the brake booster, which uses engine vacuum (or sometimes electrical power) to help you push the pedal down. If the booster fails, your brakes still work, but you have to press much harder.
- Pushing Down While Idling: If the pedal sinks slightly while the car is idling, your vacuum supply might be compromised or the one-way check valve in the booster line is failing.
- Pedal Rises When Braking: If the pedal seems to push up against your foot slightly when you press it, this is a very strong indicator that the internal diaphragm of the brake booster has ruptured, causing combustion gases to enter the system—a serious issue that needs fixing right away.
For more information on how your vehicle’s essential systems work together, checking resources provided by organizations like the U.S. Department of Transportation can offer helpful background context on vehicle safety components.
Sign 4: Noises From the Pedal Area
Brakes should operate quietly. If you hear clicking, squealing, crunching, or groaning sounds originating from under the dashboard when you work the pedal, you need to investigate.
- Loud Pop or Click: This often means the pivot point of the brake light switch or a bracket holding the brake pedal assembly has broken or become loose. This is usually an easy, inexpensive fix like replacing a clip or tightening a bolt.
- Squeaking or Grinding: If the noise happens right where the pedal pivots on its shaft, the pivot bushings or hinge might be worn out or dry. Lubrication can sometimes fix a simple squeak, but if it’s grinding, metal parts are rubbing, and a mechanic should look at the mounting bracket soon.
Sign 5: The Pedal is Too Firm or Hard (Stiff Brake Pedal)
This is the opposite of the spongy pedal. A hard pedal means you have to stand on the brakes to slow down, which is tiring and unsafe. Remember, the booster assists you. If the booster fails completely (or if you have a vacuum leak denying the booster pressure), you lose that assistance.
The Test: To confirm if it’s the booster and not the master cylinder seals, try this simple test:
- Turn off the engine.
- Pump the brake pedal a few times until the pedal feels firm and hard. This uses up the residual vacuum stored in the booster.
- Hold the brake pedal firmly in place.
- Now, start the engine.
The Result: If the pedal sinks significantly (even just an inch) after the engine starts, your brake booster is working correctly, and the problem likely lies elsewhere (like low fluid). If the pedal does not move down when the engine starts, the brake booster has failed and needs replacement.
Identifying the Culprit: A System Breakdown
When the pedal misbehaves, the problem almost always traces back to one of three major components that the pedal actuates. Since you are trying to determine if the pedal itself is bad, understanding what it connects to helps you diagnose whether you need a brake job or a pedal assembly adjustment.
| Sign Experienced | Most Likely Component to Check First | Why This Component is Suspect |
|---|---|---|
| Spongy/Low Pedal | Brake Fluid Level & Lines | Air ingress into the hydraulic system. |
| Sinks to Floor Slowly | Master Cylinder | Internal seals are worn, allowing fluid to bypass pistons. |
| Hard/Stiff Pedal | Brake Booster (or Vacuum Line) | The power assist mechanism is not engaging or receiving vacuum. |
| Noises at Pivot Point | Brake Pedal Assembly/Bushings | Physical wear on the hinges or mounting hardware under the dash. |
Focus on Fluid: The Simplest Check
Before blaming expensive parts, always check the easiest thing: your brake fluid reservoir. Low fluid will cause sponginess because it allows air pockets to form easily.
- Locate the translucent reservoir, usually mounted on the firewall near the driver’s side.
- Check the fluid level against the “MIN” and “MAX” lines.
- If it’s low, top it off with the correct DOT fluid specified in your owner’s manual (usually DOT 3 or DOT 4).
Important Note: If the fluid was low, adding more is only a temporary patch unless you find the leak! Low fluid means a leak somewhere—possibly worn calipers, a leaky wheel cylinder, or a leaking master cylinder. Driving on worn pads can also cause fluid levels to drop slightly over time, but significant drops need investigation.
The Connection to the Master Cylinder
The master cylinder is where the mechanical action of pushing the pedal translates into hydraulic pressure. Most modern cars have a dual-circuit system, meaning the master cylinder has two separate pistons, keeping you safe even if one circuit fails.
When a master cylinder fails internally (as evidenced by a sinking pedal), it’s a common repair item. While it might seem intimidating, aftermarket parts are widely available, and many experienced DIYers tackle this job. Remember, the National Highway Traffic Safety Administration (NHTSA) reminds drivers that brake system repairs must be done correctly to maintain safety standards.
The Role of the Brake Booster
If your pedal is hard, the booster is the primary suspect. The booster is essentially a large, circular metal canister connected via a hose to the engine’s vacuum source. When you press the pedal, the vacuum assists your leg strength. If the hose cracks, leaks, or the internal diaphragm tears, the vacuum assist disappears.
Think of it like trying to open a tight jar lid if someone else is holding it tightly for you versus trying to open it alone—the booster is the helper. If the helper quits, your job gets much harder!
DIY Diagnosis: Simple Tests You Can Do Today
You don’t need a lift or complex tools to check the main pedal-related diagnostics. Use these simple tests to gather clarity before calling the shop.
Test 1: The Pedal Height Test
This helps determine if you are losing pressure slowly due to internal leaks.
- Park your car on a level surface and set the parking brake firmly.
- Start the engine and let it idle.
- Press the service brake pedal firmly but gently. Do not stomp on it.
- Hold constant pressure on the pedal for 60 seconds.
- Observe the pedal position. Does it inch slowly downward toward the floor?
Result Interpretation: If the pedal sinks noticeably while you maintain pressure, suspect the master cylinder. If the pedal stays firm right where you initially pressed it, the hydraulics are likely sound, and the issue might be external (like a booster or linkage).
Test 2: The Vacuum Leak/Booster Test (The Hard Pedal Check)
This confirms if your power assist is functioning correctly.
- Pump the anti-lock brake pedal 5–6 times with the engine off to exhaust all the stored vacuum in the booster.
- With your foot resting lightly on the pedal, start the engine quickly.
- Watch what the pedal does the moment the engine catches.
Result Interpretation: If the pedal immediately drops down one to two inches when the engine starts, your booster is sucking air correctly and providing vacuum assist. If it stays rigid, the booster system is likely faulty.
Test 3: Checking for Play and Noise
This focuses on the physical components near the pedal itself.
- Get down on the driver’s floorboard (a flashlight helps!).
- Locate where the pedal arm bolts to the firewall/pedal hanger.
- Wiggle the brake pedal side-to-side gently.
Result Interpretation: You should feel very minimal side-to-side wiggle before the pedal moves. Excessive clunking, scraping, or looseness where the pedal pivots means the bushings or mounting hardware may be worn. This often causes annoying dashboard noises but rarely affects stopping power unless the linkage is severely damaged.
When to Call a Professional for Your Brake Pedal
As a DIY guide, I love helping you tackle simple fixes, but brakes are non-negotiable when it comes to safety. While checking fluid or testing the booster is something everyone can do, certain problems demand professional attention because they involve pressurized systems or complex diagnostics.
Immediate Red Flags Requiring a Shop Visit
If you experience any of the following, park the car safely and arrange a tow. Do not attempt to drive it anywhere if you can avoid it:
- The brake pedal goes completely to the floor without stopping the car.
- Braking performance is inconsistent—sometimes it works, sometimes it doesn’t.
- You smell burning rubber or hot metal immediately after braking, even at low speeds.
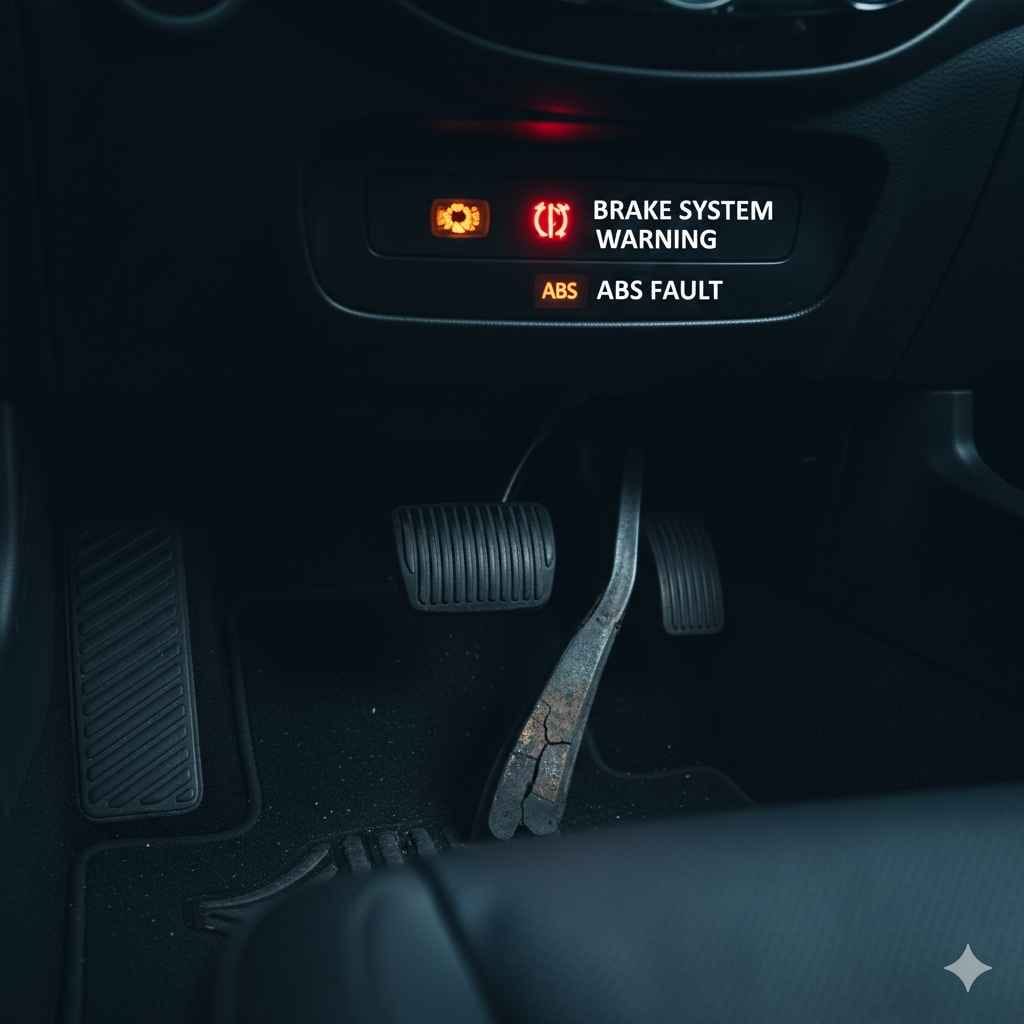
- The brake warning light on your dashboard is constantly illuminated (this indicates a loss of hydraulic pressure in one or both circuits).
When the Pedal Feel is Weird, But Not Failing
If your pedal is slightly spongy, or you suspect the booster is weak but the pedal still stops you safely, you should still schedule service soon. A mechanic can perform a full brake system pressure test to diagnose a failing master cylinder before it completely gives out. They can also check the intricate linkages connecting the pedal to the brake light switch, ensuring all your safety signals are working correctly.
Remember, maintenance is cheaper and safer than surprise repairs. Keeping up with fluid flushes (typically every two to three years, depending on climate) prevents moisture buildup that eats away at internal brake components.
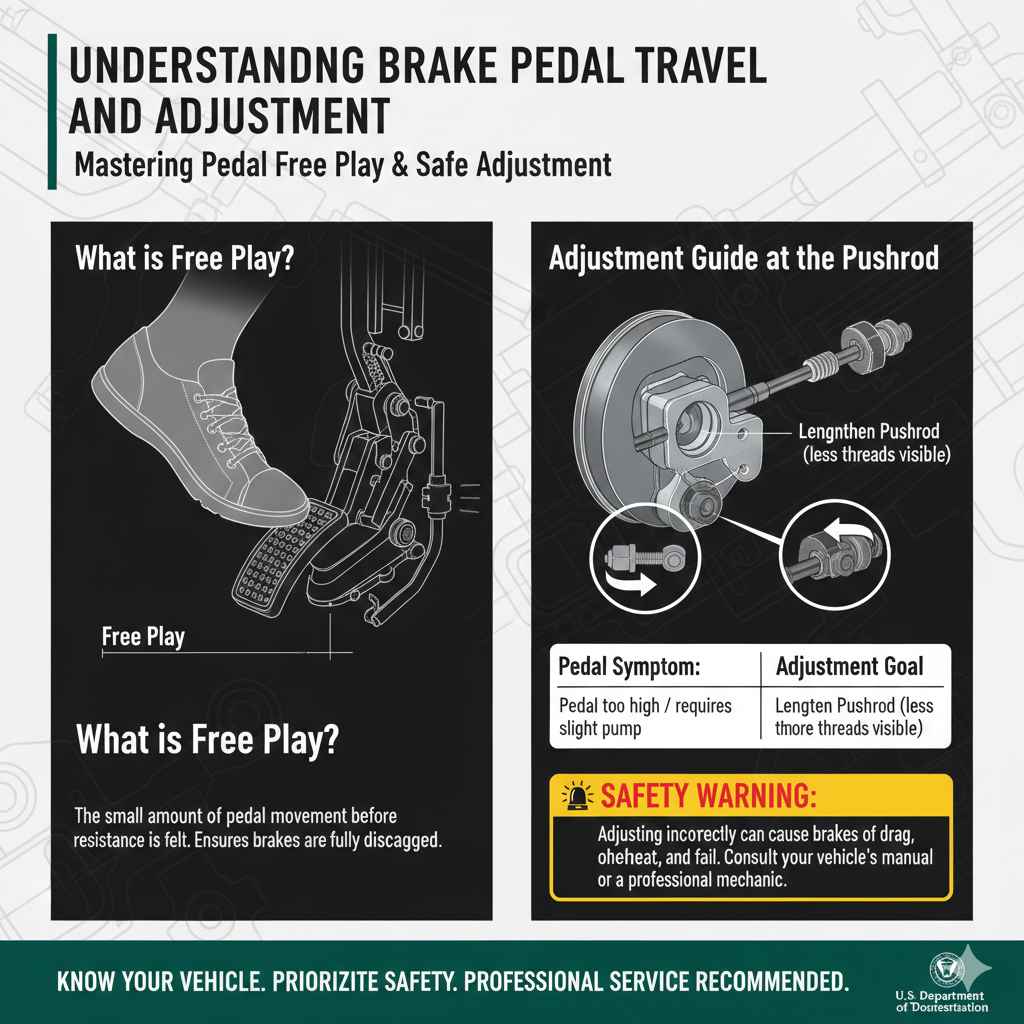
Understanding Brake Pedal Travel and Adjustment
If you have an older car or a vehicle you suspect has been improperly serviced, you might wonder if the pedal simply needs adjustment. In most modern vehicles, the brake pedal linkage is self-adjusting as the brake pads wear down. However, the starting height (or “free play”) can sometimes be adjusted.
What is Free Play?
Free play is the small amount the pedal moves downward before you feel any resistance or engagement of the master cylinder piston. Too much free play, and you have to push too far; too little, and the brake shoes might drag slightly.
Adjustment is usually made where the pushrod from the pedal assembly meets the back of the master cylinder. This connection often has a threaded rod with a locknut on it.
| Pedal Symptom | Adjustment Goal at Pushrod | Caution |
|---|---|---|
| Pedal too high/requires a slight pump | Slightly lengthen the pushrod (less threads visible) | Do not reduce free play too much, or the brakes will drag. |
| Pedal sinks too easily | Slightly shorten the pushrod (more threads visible) | Ensure the pedal still fully releases the brake lights. |
Safety Warning: Adjusting the pushrod too far can cause your brakes to remain partially engaged, leading to overheating, premature wear, and potentially brake failure due to excessive heat. Unless you are comfortable measuring the specified free play in your vehicle’s manual, leave adjustment to a professional.
Frequently Asked Questions (FAQs)
Q1: Can a bad brake pedal cause my brakes to squeal?
A: Usually no. A truly “bad” pedal (master cylinder or booster failure) causes functional problems like sponginess or stiffness. Squealing during braking usually points to worn brake pads (the wear indicator is touching the rotor) or sometimes debris trapped between the pad and the rotor.