
The main difference between transmission solenoids is their job: Transmission Shift Solenoids specifically control when gears change, while Transmission Control Solenoids manage the overall fluid flow and pressure within the transmission system based on the car’s computer input. Swapping or replacing the wrong one can stop shifting or cause poor performance. Use this guide to know which one you need.
Does your car feel sluggish when changing gears? Maybe it hesitates, slips, or makes a clunking noise when accelerating? These frustrating feelings often point toward a small but mighty part called the transmission solenoid. It’s easy to feel overwhelmed when a mechanic mentions “solenoids,” but don’t worry. Those little electronic valves are the heart of your automatic transmission’s ability to shift smoothly.
Understanding the names can be the trickiest part. You might hear terms like “shift solenoid” and “control solenoid” used interchangeably, which causes confusion when you need a replacement part. We are going to break down the specific roles, show you the obvious differences, and give you simple steps to tackle common fixes yourself. Getting a handle on these components will help you save money and keep your ride running reliably. Let’s dive under the hood and straighten out this solenoid mix-up!
What Are Transmission Solenoids and Why Do They Matter?
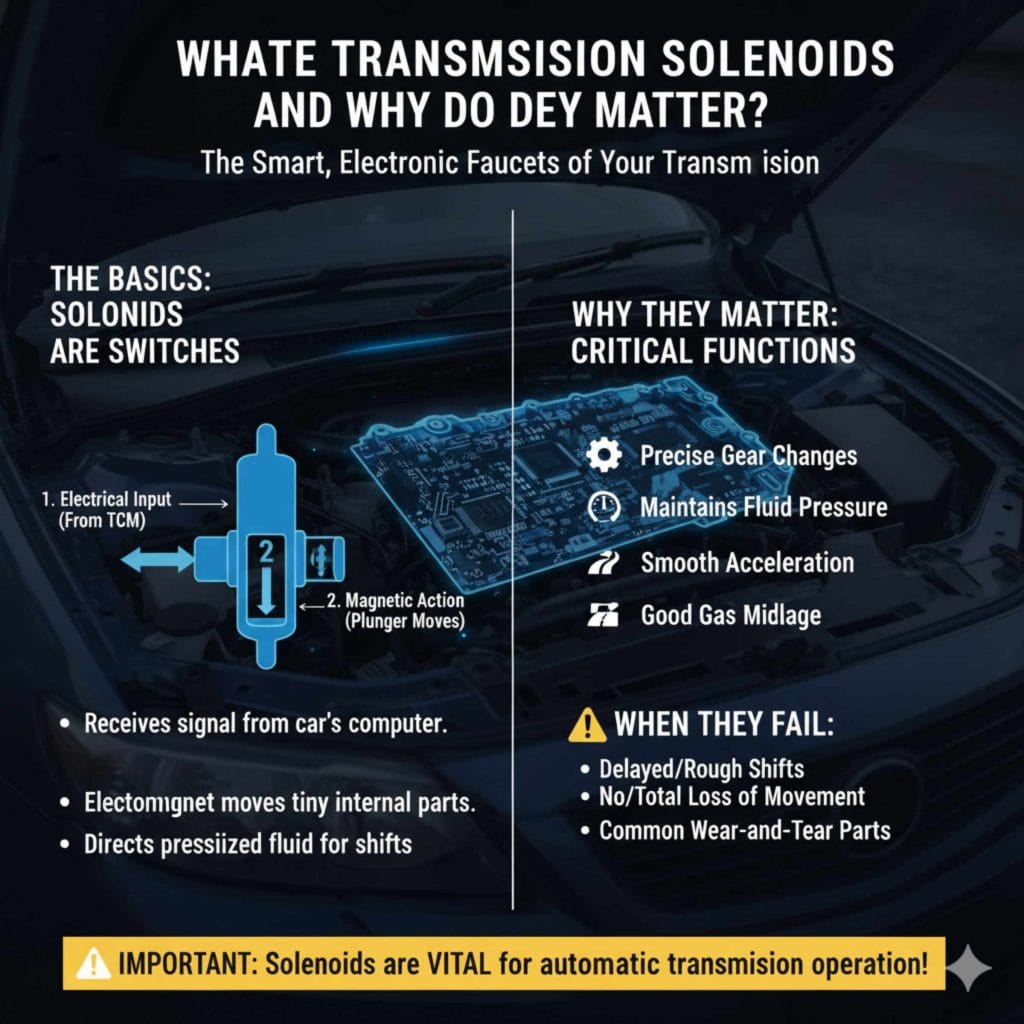
Imagine your automatic transmission as a very complex plumbing system. It has fluid moving everywhere to lubricate parts and create pressure. Solenoids are basically the smart, electronic faucets in that system. They are small electromagnetic devices that the Transmission Control Module (TCM)—the car’s computer—uses to open or close passages, directing hydraulic fluid precisely where it needs to go.
Without functioning solenoids, your transmission can’t “talk” to the fluid correctly. This leads to serious problems like delayed shifts, rough shifts, or even a total failure to move. Because they deal with electricity, fluid pressure, and heat all day long, they are common wear-and-tear items.
The Basics: Solenoids Are Switches, Not Physical Parts
It helps to know that solenoids are primarily electrical. When the TCM sends an electrical signal (a command), the solenoid uses an electromagnet to physically move a small plunger or valve inside the transmission valve body. This action changes the path of the transmission fluid, which results in a gear change (like going from 1st to 2nd gear).
- Electrical Input: Receives a signal from the car’s computer.
- Magnetic Action: Uses an electromagnet to move tiny internal parts.
- Hydraulic Output: Directs pressurized transmission fluid to engage or disengage gears/clutches.
The Crucial Difference Between Transmission Control Solenoid and Transmission Shift Solenoid
This is where most confusion happens. While both types of solenoids use electricity to move fluid, their responsibilities are distinct. Think of it like running a busy restaurant kitchen—you have line cooks (Shift Solenoids) and a Head Chef who manages the overall flow (Control Solenoid).
1. Transmission Shift Solenoids (SS): The Gear Selectors
Shift solenoids are the most numerous and most commonly replaced solenoids in an automatic transmission setup. Their job is very specific and direct: they manage the engagement of individual gears.
If your car has four forward gears (1, 2, 3, 4), it will likely have two or more shift solenoids working together. The TCM tells Shift Solenoid A to activate and Shift Solenoid B to deactivate to achieve 2nd gear, for example. They are the ones responsible for the physical act of clicking into the next gear ratio.
Common Failure Symptoms for Shift Solenoids:
- Specific gears will not engage (e.g., the car only stays in 1st gear).
- Harsh, sudden, or “banging” shifts when they finally do change.
- The car might shift too early or too late.
2. Transmission Control Solenoids (TCS) / Pressure Control Solenoids (PCS): The Fluid Managers
Control solenoids, often called Pressure Control Solenoids (PCS), manage the overall hydraulic pressure and flow within the entire transmission. They act more like master regulators. Instead of controlling which gear engages, they control how smoothly the fluid moves to engage that gear.
A common type is the Torque Converter Clutch (TCC) solenoid, which is a type of control solenoid. Its job is to lock up the torque converter at cruising speeds to improve fuel economy. If this fails, the transmission might feel hesitant or shudder when cruising.
Another major control solenoid manages line pressure. If the pressure is too low, the clutches can slip, causing overheating and wear. If the pressure is too high, the shifts become very hard and jerky.
Common Failure Symptoms for Control/Pressure Solenoids:
- General sluggishness or general rough shifting across all gears.
- Overheating or burning smell from the transmission fluid.
- Poor fuel economy due to the torque converter not locking up correctly.
Comparison Table: Quick Reference
To keep things crystal clear, here is a side-by-side look at the two main functional groups:
| Feature | Transmission Shift Solenoid (SS) | Transmission Control/Pressure Solenoid (PCS/TCS) |
|---|---|---|
| Primary Role | Directly engages specific gear positions. | Regulates overall fluid pressure and flow in the system. |
| Scope of Action | Specific to one gear change (e.g., 2nd to 3rd). | Affects the entire transmission’s operation (slippage, shudder). |
| Symptom Example | Car won’t go into 3rd gear at all. | All shifts feel very hard or the car slips slightly when cruising. |
| Location Note | Often grouped near the wire connectors. | May include the TCC solenoid or main line pressure regulator. |
Identifying Solenoid Issues: What the Dashboard Is Telling You
Modern cars rely heavily on sensors and computers. When a solenoid stops working correctly—either sticking open, sticking closed, or giving a resistance reading that the computer doesn’t like—it will almost always trigger a warning light. This warning light is your best friend when diagnosing these electrical transmission issues.
The Check Engine Light (CEL)
For most newer vehicles, a failing solenoid will trigger the Check Engine Light. This light is generic, but the underlying computer codes (DTCs) are specific. You will need an OBD-II scanner to read these codes. For example, you might see codes like P0750 (Shift Solenoid ‘A’ Malfunction) or P0740 (Torque Converter Clutch Circuit Malfunction).
Action Step: Get the codes read! Many auto parts stores will do this for free. The code will often point you directly to the specific solenoid circuit that is failing, making your repair specific rather than a guess.
Intermittent Slipping and Erratic Shifting
Sometimes the solenoid isn’t completely dead; it’s just “lazy.” This means it hesitates before responding to the computer’s command. This hesitation causes a slight delay where the engine revs up slightly before the gear engages too hard. This intermittent behavior is harder to diagnose with just a code reader but is a classic sign of an aging solenoid pack.
Essential Fixes: How to Approach Solenoid Replacement
Replacing a solenoid is often achievable for a beginner DIY mechanic, but it requires patience and attention to detail. The complexity largely depends on where the solenoid pack is located. In some front-wheel-drive cars, it’s on the side of the transmission case; in others, it’s buried under the valve body inside the transmission pan.
Safety First: Preparing for Transmission Work
Before you even open a wrench set, remember that transmission fluid is hot and messy. Always prioritize safety:
- Let the Car Cool Down: Ensure the engine and transmission have fully cooled off.
- Keep it Level: Use sturdy jack stands on level ground. Never work under a car supported only by a jack. Refer to reputable safety guidelines from organizations like the National Highway Traffic Safety Administration (NHTSA) on proper vehicle support.
- Use Proper Fluids: Have the exact type of transmission fluid recommended by your vehicle manufacturer ready. Using the wrong fluid (like using regular ATF in a vehicle requiring ATF+4 or a specific synthetic blend) can destroy the transmission quickly.
Tools You Will Likely Need
Gathering the right tools makes the job infinitely easier. Simple repairs don’t require complex transmission removal.
- OBD-II Scanner (for code reading).
- Basic wrench and socket set (Metric is most common).
- Torx bits or specialized hex keys (many newer solenoids use these).
- Drain pan large enough for several quarts of fluid.
- New gaskets and/or RTV sealant (if required for the pan).
- The correct replacement solenoid(s) or solenoid pack.
Step-by-Step Guide to Replacing a Solenoid (External Type)
This guide addresses solenoids bolted onto the exterior or accessible with just the pan removal. If your solenoid requires dropping the entire valve body from the transmission, that repair is generally best left to a professional due to the risk of mixing up valve body components.
Step 1: Locate and Identify the Faulty Solenoid
Using your OBD-II code, identify which solenoid is bad (e.g., Shift Solenoid C). Consult your vehicle’s repair manual or a trusted online resource to pinpoint its exact location. Often, they are clustered together and identifiable by wire color or connector shape.
Step 2: Disconnect Battery Power
Safety check! Disconnect the negative battery terminal using a 10mm wrench. This prevents accidental electrical shorts while working near the transmission’s wiring harness.
Step 3: Drain the Transmission Fluid
Place your large drain pan underneath the transmission pan. Locate the drain plug (if present) and carefully drain the fluid. If there is no plug, you must support the pan with one hand (it will be heavy!) while removing the bolts on the opposite side first. Slowly and carefully lower the pan to catch the remaining fluid.
Step 4: Expose and Remove the Old Solenoid
Once the pan is off, you will see the valve body, and the solenoids will likely be plugged into it. They are usually held in place by one or two small bolts.
- Unplug the electrical connector from the solenoid.
- Using the correct socket or Torx bit, carefully remove the mounting bolt(s).
- Gently pull the old solenoid free. Be prepared for a small amount of fresh fluid to leak out as you remove it.
Step 5: Install the New Solenoid
Crucial Tip: If you are replacing a whole solenoid pack (where several solenoids are bolted together), ensure the new pack is oriented exactly the same way the old one was. Even a slight rotation can cause major shifting issues.
- Slide the new solenoid into the bore, ensuring it seats correctly and the plunger enters the valve body opening.
- Reinstall the mounting bolt(s) and tighten them according to the manufacturer’s torque specification (this is usually very slight for small bolts, so be gentle not to strip the threads).
- Plug the electrical connector back in until it securely snaps.
Step 6: Reassembly and Refill
- Clean the transmission pan mating surface thoroughly.
- Install a brand-new gasket (if your pan uses one) or apply a thin, even bead of RTV silicone sealant (if specified by the manufacturer). Carefully reinstall the pan and tighten the bolts in a crisscross pattern to avoid warping the pan.
- Refill the transmission with the correct amount and type of fresh fluid through the dipstick tube, gradually checking the level. (Consult a reliable source like AutoZone’s guides for typical refill procedures relevant to your vehicle style.)
The Importance of Proper Fluid Level
A common mistake after replacing a solenoid is forgetting that you drained fluid. If you don’t refill it correctly—testing while the engine is running in Park or Neutral, depending on your car—the new solenoid won’t operate under the correct pressure, leading to immediate slippage or failure codes.
Advanced Checks: Diagnosing Solenoids Without Replacing Parts
If you have a code but aren’t sure if the solenoid is bad or if the wiring leading to it is the problem, you can test the electrical resistance of the solenoid itself. This avoids wasting money on a new part if the wiring is frayed.
Testing Solenoid Resistance (Ohms Test)
Every solenoid is designed to have a specific electrical resistance, measured in Ohms (Ω). The TCM activates the solenoid based on this resistance.
How to Test:
- Locate the solenoid connector harness (this might require removing the pan).
- Set your multimeter to read Ohms (Ω).
- Carefully connect the multimeter leads to the two pins inside the solenoid connector.
- Compare the reading to the specification listed in a repair manual for your specific transmission model. Standard solenoids often read between 10 to 20 Ohms, but this varies widely.
What the Results Mean:
- Reading near Zero (0 Ω): This indicates a short circuit, meaning the coil inside the solenoid is internally damaged. The solenoid is bad.
- Reading Infinity (OL on the meter): This indicates an open circuit, meaning the internal wire has completely broken. The solenoid is bad.
- Reading is Correct (within spec): If the resistance is correct, the solenoid itself is likely fine. The issue might be in the wiring harness leading from the transmission to the computer, or the computer (TCM) itself is sending a bad signal.
Understanding Valve Body Issues vs Solenoid Issues
Solenoids sit inside the valve body—the “brain” of the hydraulic system. While a solenoid might fail, sometimes dirt, debris, or sludge prevents the solenoid from moving its internal plunger, even if the electronics are good.
If you clean and replace a solenoid, but the problem persists, the entire valve body might be sticking due to debris. A full valve body swap is a much larger repair, often involving clearing out tiny fluid pathways. Regular, high-quality transmission fluid changes are the best defense against this internal blockage.
When to Call a Trusted Mechanic
While basic solenoid replacement is possible for DIYers, there are times when calling a professional is the smartest, safest, and most cost-effective choice.
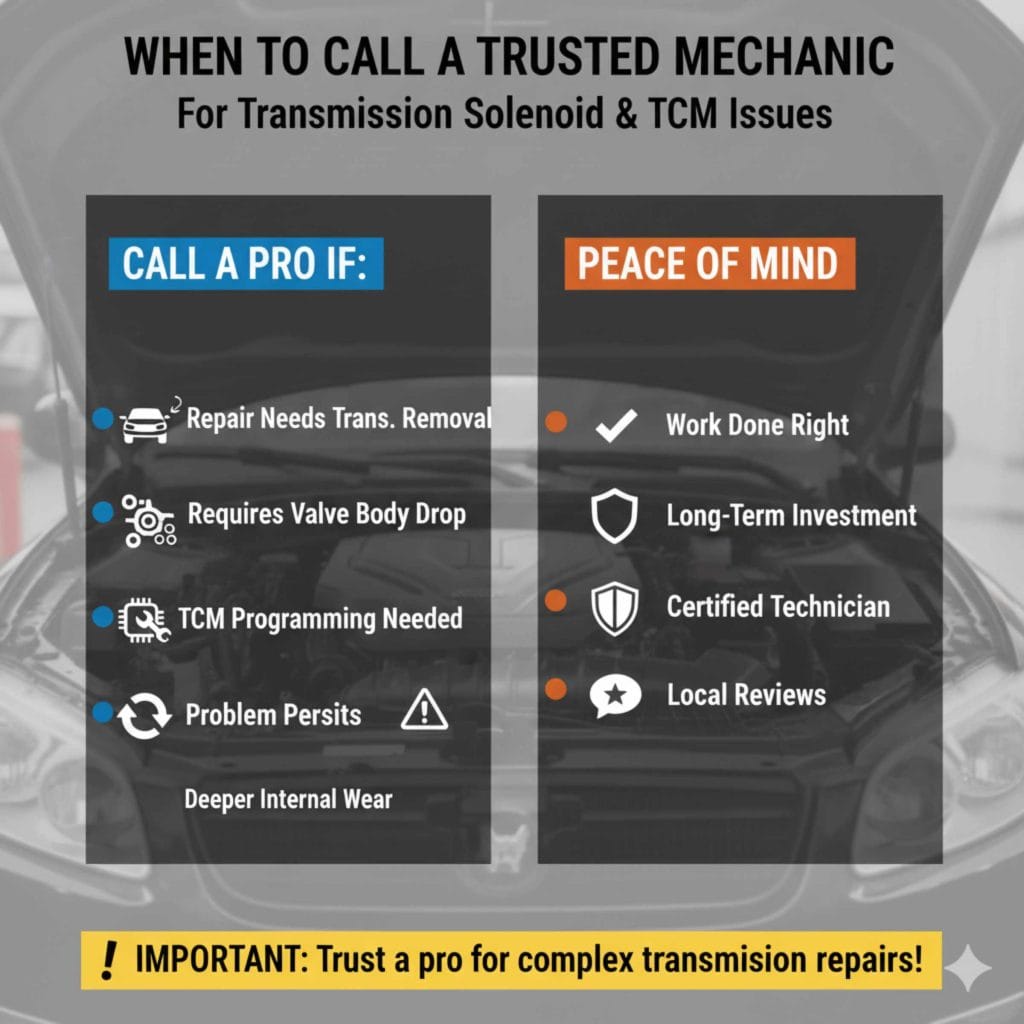
Call a Pro if:
- The repair requires removing the transmission from the vehicle.
- The specific solenoid cannot be accessed without dropping the entire valve body assembly (which holds hundreds of check balls and springs).
- Your diagnostic codes point to the TCM (Transmission Control Module) itself, which requires specialized programming tools.
- You have already replaced the solenoids, and the problems persist—this indicates a deeper internal mechanical wear problem.
Remember, making an informed decision is key. If you feel uneasy or unsure about the mechanical alignment of internal parts, trusting a certified transmission technician ensures the work is done right the first time, protecting your long-term investment. You can often find reliable, certified shops by searching resources developed by organizations focused on automotive standards, though checking local reviews is always wise.
Frequently Asked Questions (FAQs) for Beginners
Q1: Is it safe to drive my car if a transmission solenoid starts failing?
A: It is generally not recommended. Failing solenoids cause erratic shifting, which can lead to high heat buildup and slipping. Driving too long can turn a simple solenoid fix into a necessity for a complete transmission rebuild. Drive only as far as needed to get it serviced.
Q2: How much does it typically cost to replace just one transmission solenoid?
A: If you DIY the repair, the part might cost between $50 and $150 for a single basic solenoid. If you pay a professional, expect the total bill to range from $300 to $600, depending on labor rates and the complexity of accessing the part.
Q3: Can I fix a sluggish transmission by just changing the fluid?
A: Sometimes! If the fluid is old, dirty, or low, a fluid and filter change can sometimes free up a “sticky” solenoid, especially a pressure control solenoid. However, if the solenoid’s internal coil is electrically dead, only replacement will solve it.
Q4: Is the Transmission Control Solenoid the same as a Shift Solenoid?
A: No, they are not the same, even though the names sound similar.
A Shift Solenoid controls which gear the transmission shifts into (1st, 2nd, 3rd, etc.).
A Transmission Control / Pressure Solenoid manages how smoothly that shift happens by regulating fluid pressure. Replacing the wrong one can result in continued shifting problems or even make the issue worse, which is why proper diagnosis is critical.
Q5: Should I replace all solenoids at once or just the bad one?
A: It depends on mileage, cost, and access.
If your vehicle has high mileage (100,000+ miles) and requires removing the transmission pan or valve body, many mechanics recommend replacing all solenoids as a set to avoid paying labor twice.
However, if only one solenoid has failed and the others test within specifications, replacing only the faulty solenoid is perfectly acceptable and more budget-friendly.
Conclusion: Know the Difference, Fix the Right Problem
Transmission solenoids may be small, but they play a massive role in how your car drives. Understanding the difference between shift solenoids and control (pressure) solenoids can save you from unnecessary repairs, wasted money, and ongoing frustration. One controls gear selection, the other controls fluid pressure—and confusing the two often leads to poor performance or repeat failures.
The key takeaway is simple: diagnosis comes before replacement. Warning lights, trouble codes, fluid condition, and electrical testing all help pinpoint whether the problem lies with a specific solenoid, the wiring, or the transmission control module itself. Jumping straight to part replacement without this knowledge can quickly turn a manageable fix into a costly mistake.
For DIY-minded drivers, many solenoid repairs are achievable with patience, the right tools, and attention to detail. For more complex cases—especially those involving valve bodies or computer control—professional help is the smarter and safer option.
By understanding how transmission solenoids work and recognizing their symptoms early, you put yourself in control. Whether you’re talking confidently with a mechanic or tackling a repair yourself, this knowledge helps keep your transmission shifting smoothly, your repair costs lower, and your car reliable for the long haul!